June 1st, 2011 § § permalink
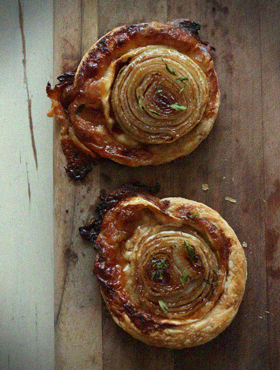
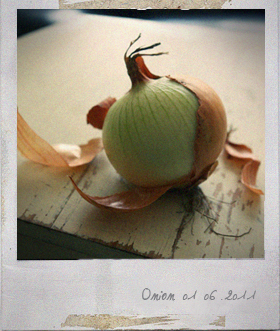
My mum always told me that onions make my brain work good.
I don’t know if there is any evidence of it, or maybe she just tried to make me eat onions.
Anyway, I eat onions today.
I need to be a little bit clever this week.
——————————
— Caramelised Onion & Goat Cheese Tarts (4 x 4 inch tarts) —
1 onion
100g goat cheese
200g puff pastry
2 tablespoons balsamic vinegar
1 tablespoon brown sugar
1 tablespoon olive oil
Some fresh thyme leaves
——————————
Preheat oven 200C/400F.
Slice the goat cheese thickly (4 slices).
Slice the onion thickly (4 slices). Heat the olive oil in a frying pan over medium heat, place the onion slices and cook for 3-4 minutes each side until they start to soften.
Roll the puff pastry on a light floured work surface into a sheet. Cut 4 x 4 inch rounds from the pastry and place on a baking try lined with baking paper.
Place the goat cheese slice on the middle of pastry and put the fried onion on top.
Mix the balsamic vinegar and brown sugar in a bowl and drizzle over the onion slices. Sprinkle the fresh thyme leaves.
Bake for 20-30 minutes until puffed and golden brown.
May 22nd, 2011 § § permalink
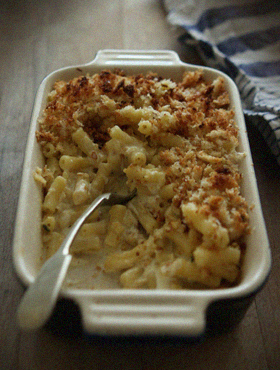
I decided to make this menu when I was thinking how to use a slightly stale yesterday’s baguette.
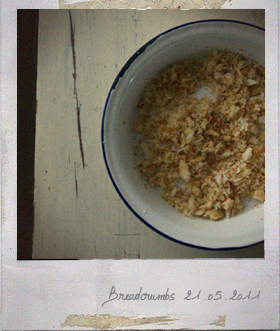
Fresh breadcrumbs are really easy to make. Put the bread in a food processor or cut the bread finely with a bread knife.
This seasoned breadcrumbs taste like garlic bread, it goes well with the macaroni cheese.
——————————
— Macaroni Cheese Gratiné (serves 2) —
200g macaroni pasta
120ml single cream
100ml milk
100g cheddar cheese, grated
30g parmesan, finely grated
1/2 teaspoon fresh thyme, finely chopped
Some salt and black pepper
100g fresh breadcrumbs
1 clove garlic, minced
30g butter, melted
——————————
Cook the macaroni pasta in a large pan of salted boiling water until al dente (follow the package directions). Drain and return to the pan.
Add the single cream, milk, grated cheddar cheese and grated parmesan in the pan, cook and stirring over low heat for 3 minutes. Add the chopped thyme, season with a pinch of salt and pepper and transfer into a baking dish.
Place the fresh breadcrumbs, minced garlic and melted butter in a bowl, toss until well combined.
Sprinkle the breadcrumbs onto the macaroni mixture and bake in a preheated 200C/400F oven for about 7 minutes until golden and crispy.
May 5th, 2011 § § permalink

This is a crisp savoury snack.
the combination of spicy miso oil and mozzarella cheese is absolutely delicious and addictive.
Easy to make and eat. I found a perfect snack for beer!
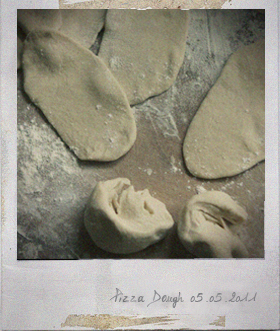
——————————
— Spicy miso & cheese pizza bread (makes 10 : 16cm x 8cm each size )—
2 tablespoons miso paste (light brown coloured miso is preferred)
2 tablespoons rapeseed oil
1/2 – 1 teaspoon chili flakes (adjust to you taste)
1/2 teaspoon honey
1 clove garlic, minced
100g grated mozzarella cheese
Some parsley, chopped
*****
— for pizza dough —
200g plain flour
1/2 tablespoon dry yeast
1/2 teaspoon sugar
1/2 teaspoon salt
1/2 tablespoon olive oil
——————————
Place the dry yeast and sugar in a bowl, mix in 120ml lukewarm water. Set aside in a warm place for 5 minutes, until bubbles appear on the surface.
Place the flour, salt and olive oil in a different bowl, add the yeast mixture and mix together.
Transfer the dough to a floured surface board and knead for about 5 minutes.
Make the dough into a ball, place on a floured tray under a clean, dump cloth and set aside in a warm place for 40 minutes.
To make the spicy miso oil, place the miso, oil, honey, minced garlic and chili flakes in a bowl and mix until well combined.
Divide the pizza dough into 10 balls and roll out on a floured surface board to ovals.
Brush the baking tray with olive oil and lay the oval bases on the tray.
Spread the spicy miso oil and top with grated mozzarella.
Bake in a preheated 220C/425F oven for about 8 minutes until topping is golden and the base is crispy.
Garnish with chopped parsley.
May 2nd, 2011 § § permalink
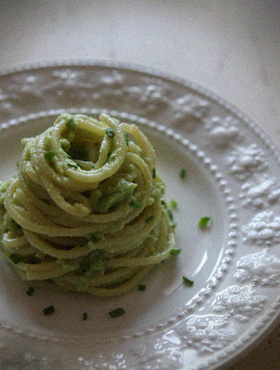
This is a chilled pasta with very rich and creamy wasabi-hinted avocado sauce.
If you enjoy a little kick of wasabi, then this appetizer is for you.
I love the unique flavor and hotness of Wasabi. But I hated it when I was a child. I don’t remember how and when I started liking it. The same thing happened to black coffee, beer and Marmite.
I want to know where is the ‘hate’ to ‘love’ switch and how to operate it.
——————————
— Pasta Salad with Avocado & Wasabi (Appetizer: serves 4) —
200g pasta
2 medium ripe avocados
1 teaspoon (adjust to you taste) wasabi paste
1 clove garlic, minced
1 tablespoon fresh lemon juice
1 table spoon mayonnaise
1 tablespoon walnut oil
1/2 teaspoon salt
A pinch of black pepper
Some chives, finely chopped
——————————
Cook the pasta in a large pan of salted boiling water until cooked (follow the package directions). Drain and rinse well under cold water.
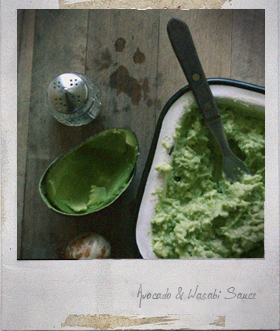
Peel the avocados, remove the stones and mash with a fork fairly smooth in a bowl. Add the wasabi, minced garlic, lemon juice, mayonnaise, walnut oil, salt and pepper, mix together well.
Drain the cold pasta, toss with the avocado sauce.
Sprinkle with the chopped chives.
April 14th, 2011 § § permalink
Light up Japan recipe –No.10
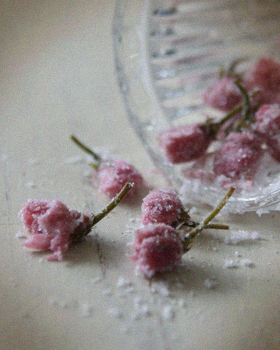
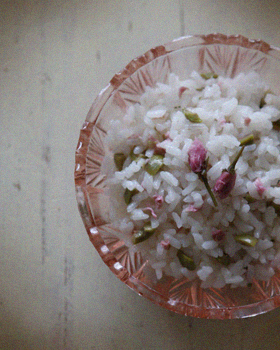
One of the main reasons why I like spring is cherry blossoms.
Cherry blossoms have special meanings in Japanese culture, these are seen as a metaphor for life. A noble, beautiful blooming followed by the inevitable fall.
At this time of the year in Japan, we have a lot of ‘cherry blossom viewing party’. Drinking, eating and singing under the cherry blossom trees, appreciate and celebrate the beauty of cherry blossoms.
Japanese people are still having a very sad and hard time, but I believe that cherry blossoms lift their spirits.

——————————
— Cherry Blossom and Green Olive Rice (Serves 2) —
8-10 salt-preserved cherry blossoms
8-10 green olives
300g rice (Japanese short grain white rice, or sushi rice)
420ml water
*****
— for salt-preserved cherry blossoms—
100g double-flowered cherry blossoms
50g sea salt
50g sea salt for preserve
——————————
— Salt-preserved cherry blossoms —
Cut the flowers (with the short stems), wash them gently in cold water and drain.
Toss the blossoms with the salt, place the salted flowers in a plate, cover with cling film and place a weight on the top of it to force out excess water, then leave it for 2 days.
Drain the water, and pat dry the flowers with kitchen papers.
Place the flowers in a small bowl, sprinkle them with the vinegar, cover with cling film and place a weight on the top of it again, and leave it for 2 more days.
Drain the vinegar, pat dry the flower with kitchen papers, toss the flowers with the sea salt (for preserve) and store them in a small, clean jar.
*****
— Cherry Blossoms and Green Olive Rice —
Place 8-10 salt-preserved cherry blossoms in a bowl with 420ml water, leave the flowers for 10 minutes.
Take out the cherry blossoms from the water, wring water out of the flowers (keep the water in a bowl for cooking rice*).
Rinse the rice in a clod water, changing the water several times until the water runs almost clear.
Drain the washed rice in a sieve and place in a saucepan.
Pour the water in a bowl* in the pan and cover with tight-fitting rid.
Bring to the boil over high heat and let cook for 2 minute. Reduce the heat to the lowest and simmer (always cover the pan with a rid) 15 minute. Remove from the heat, still covered, and leave the pan for another 10 minutes.
Finely cut the cherry blossoms and green olives.
Mix the cooked rice, cherry blossoms and green olives together.
April 11th, 2011 § § permalink
Light up Japan recipe –No.9

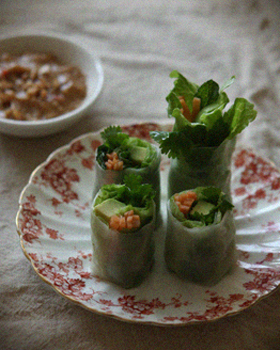
Spring has come and it’s a good idea to eat fresh Spring rolls and be refresh and enjoy Spring.
This is a great way to eat a lot of vegetables and herbs.
The creamy rich peanut dipping sauce is my favourite and I can eat too many spring rolls with it.
Suitable for vegans too.
——————————
— Salad Spring Rolls with Peanut Sauce (makes 6 rolls) —
6 medium size sheets dried rice paper
6 leaves lettuce
1 avocado
1 carrot
Handful of coriander leaves
Handful of mint leaves
*****
— For the peanut sauce —
2 tablespoons peanut butter
2/3 tablespoon miso paste
1/2 tablespoon honey
3 tablespoons soya milk
1/2 vegetable oil
1 clove garlic, finely chopped
1/2 small chili, finely chopped
2 tablespoons roasted peanuts, chopped (for garnish)
——————————
— Peanut sauce —
Heat the oil in a saucepan and lightly cook the garlic and chili.
Add the peanut butter, miso paste, honey and soya milk and mix together thoroughly, cook over low heat for 3 minutes. Sprinkle the chopped peanuts.
*****
— Salad Spring Rolls —
Tear the lettuce leaves into large pieces, cut the carrot into thin strips, cut the avocado into wedges.
Fill a large bowl with hot water, dip one wrapper into the hot water for 3 seconds to soften and flexible.
Lay the wrapper flat, place some coriander and mint leaves in a line about 1 inch from the edge of the wrapper, add some thin stripped carrot, avocado wedges, and lettuce leaves, then tightly roll the wrapper. Cut the rolls into quarters. Repeat with all the sheets.
April 8th, 2011 § § permalink
Light up Japan recipe –No.8

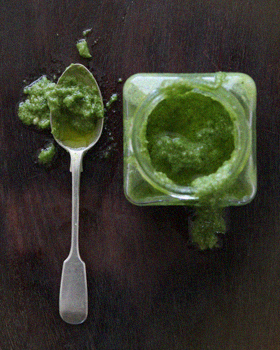
This spring onion pesto makes your pesto a little bit different.
The green part of spring onion brings a delicious bold flavour.
Simply enjoy this pesto as a pasta sauce, or it can be used in so many ways like the usual basil pesto.
——————————
— Spring Onion Pesto (400ml jar, serves 6-8 people) —
50g spring onion (only the green part), chopped
20g basil leaves, chopped
50g parmesan cheese, freshly grated
2 clove garlic, peels and crushed
3 tablespoons pine nuts
150 ml extra virgin olive oil
1 teaspoon sea salt
——————————
Heat a frying pan over medium heat and toast the pine nuts lightly for 2 minutes.
Place all the ingredients in a food processor and blend to a purée (don’t over blend).
Either use immediately or store in a jar in the fridge.
March 29th, 2011 § § permalink
Light up Japan recipe –No.5

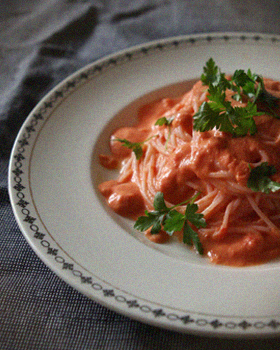
You know, red coloured foods make you feel lively.
This red sauce is made with full of red coloured ingredients, tahini and lemon juice. It has a refreshing taste, also the tahini brings nutty and rich flavour.
Rice vermicelli noodles takes only few minutes to soak in a hot water to cook, it’s a great energy-saving ingredient.
Full of red foods and full of pep.
——————————
— Chilled Rice Noodles with Red Sauce (serves 2) —
200g rice vermicelli noodles (dried)
Some Italian parsley, chopped
*****
— Red sauce —
2 tomatoes
1 red pepper
1/2 red chilli (medium hot)
1 fresh squeezed lemon
2 tablespoons tahini
1 tablespoon honey
1 tablespoon sesame oil
1 clove garlic
1 teaspoon salt
——————————
Soak the rice vermicelli noodles in hot water (follow the package directions). Rice well under cold water and drain well.
Place all the Red sauce ingredients into a blender and blend until smooth.
Mix the noodles and the red sauce in a bowl.
Garnish with chopped Italian parsley.
March 26th, 2011 § § permalink
Light up Japan recipe –No.4

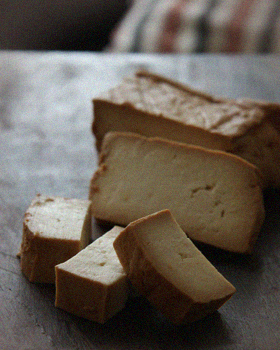
This unique appetizer has a cheese-like flavour and texture.
Just put a tofu into miso paste (fermented soya beans paste) and then miso does all the remaining work.
You can use any kind of tofu as you prefer. Firm tofu will be something like soft cheddar and soft tofu will be creamier. Also any kind of miso paste. Usually the light coloured miso has sweet and light flavour and dark coloured miso has strong mature flavour.
Very easy to make this rich and savory flavoured healthy snack. Suitable for vegans too.
——————————
— Miso Marinated Tofu —
400g tofu
150g white miso paste
150g dark or aka miso paste
——————————
Wrap the tofu in a clean tea towel or some layer of kitchen papers, and place a heavy thing (such as a pan) on top of it to force out excess water, then leave it for about 30 minutes.
Mix the white miso and the dark miso in a bowl.
Spread the 1/3 of the miso mixture into a container, place the dried tofu, and coat all side with the miso mixture, cover and refrigerate for overnight. You can marinate it up to 5 days. The longer marinate the tofu will be saltier.
Lightly wipe off any excess miso mixture, cut into bite sized pieces and serve.
* The miso mixture can be used 3 times for the marinade.
March 20th, 2011 § § permalink
Light up Japan recipe –No.2

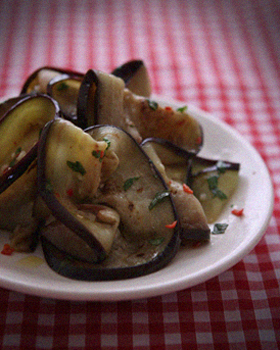
This is another energy-saving recipe, for my friends in Japan.
It takes only a few seconds to pan-fry each side of the thin aubergine slices and then marinate in olive oil dressing at room temperature.
It’s a classic Italian flavoured side dish, enjoy and be happy!
——————————
— Marinated Pan-fried Aubergine (serves 2) —
1 large aubergine
1 garlic clove, minced
2 tablespoons lemon juice
1/2 small red chilli, very finely chopped
2 tablespoons fresh basil leaves, chopped
2 tablespoons extra virgin olive oil
A pinch of salt
——————————
Cut the aubergine lengthways into very thin slices.
Heat a non-stick frying-pan, fry the sliced aubergine, turning once until it’s soft (should be fry for a few seconds each side). Put them on a plate on top of each other, this helps them to steam and soften.
Place the minced garlic, the lemon juice, the chopped chilli, the chopped basil, a pinch of salt and the olive oil in a bowl and mix together.
Place the aubergine in a flat plate and pour over the marinade.
Marinate for 30 minutes.


